After creating index.jspx, we've to create welcome page, so called index.xhtml, and add this welcome page to web configuration and redirect to index.jspx using ICEface Servlet.
1. Create index.xhtml file in the same folder where you created index.jspx
2. Enter the following code to index.xhtml
2. overwrite web.xml file, which is under WEB-INF folder, with the following code:
3. Copy the following libs, jar files, from [ICEface installed]\lib to [crm-web-project]\WebContent\WEB-INF\lib
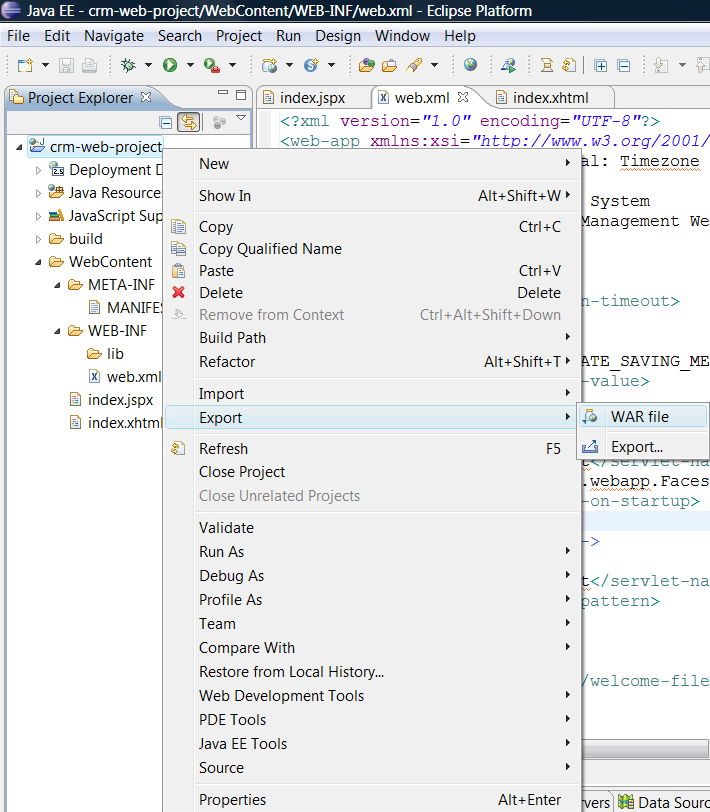
5. Select your [Tomcat installed directory]\webapps folder as Destination as shown in figure:
6. Select Overwrite existing file to overwite next time when you export war file again
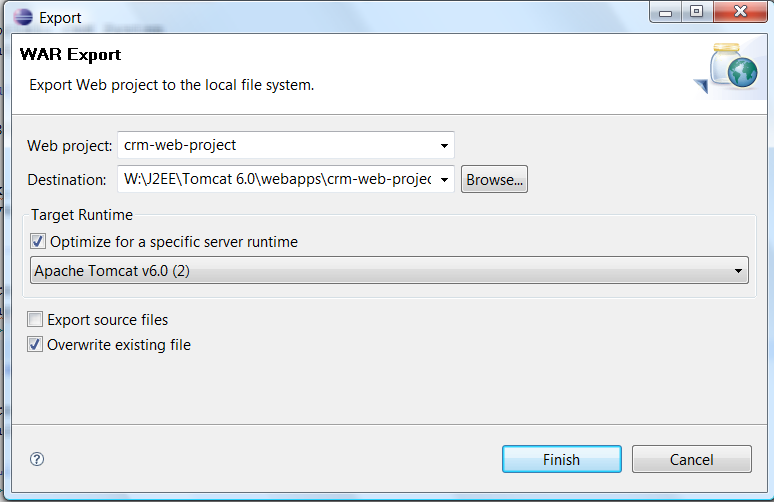
7. Click Finish to complate war file generation
8. Start Tomcat 6.0, (Restart if already sarted)
9. Then connect your web application using browser and url:http://localhost:8080/crm-web-project/index.iface
10. Congradulation! You've successfully created ICEface application. You'll see the first line of "Tank you for using ICEfaces." in your browser.
In next post, we'll start working on the style and ICEface UI Components.
1. Create index.xhtml file in the same folder where you created index.jspx
2. Enter the following code to index.xhtml
<!DOCTYPE html PUBLIC "-//W3C//DTD XHTML 1.0 Transitional//EN" "http://www.w3.org/TR/xhtml1/DTD/xhtml1-transitional.dtd">
<html xmlns="http://www.w3.org/1999/xhtml">
<head>
<meta http-equiv="Refresh" content="0; URL=index.iface" />
</head>
</html>
2. overwrite web.xml file, which is under WEB-INF folder, with the following code:
<?xml version="1.0" encoding="UTF-8"?>
<web-app xmlns:xsi="http://www.w3.org/2001/XMLSchema-instance" xmlns="http://java.sun.com/xml/ns/javaee" xmlns:web="http://java.sun.com/xml/ns/javaee/web-app_2_5.xsd" xsi:schemaLocation="http://java.sun.com/xml/ns/javaee http://java.sun.com/xml/ns/javaee/web-app_2_5.xsd" id="WebApp_ID" version="2.5">
<display-name>ICEfaces Tutorial: Timezone Part 1</display-name>
<description>
ICEfaces Tutorial: CRM System
Customer Relationship Management Web Application
</description>
<!-- Session timeout -->
<session-config>
<session-timeout>30</session-timeout>
</session-config>
<context-param>
<param-name>javax.faces.STATE_SAVING_METHOD</param-name>
<param-value>server</param-value>
</context-param>
<context-param>
<param-name>javax.faces.DEFAULT_SUFFIX</param-name>
<param-value>.jspx</param-value>
</context-param>
<context-param>
<param-name>facelets.DEVELOPMENT</param-name>
<param-value>true</param-value>
</context-param>
<!-- Faces Servlet -->
<servlet>
<servlet-name>Faces Servlet</servlet-name>
<servlet-class>javax.faces.webapp.FacesServlet</servlet-class>
<load-on-startup>1</load-on-startup>
</servlet>
<!-- Persistent Faces Servlet -->
<servlet>
<servlet-name>Persistent Faces Servlet</servlet-name>
<servlet-class>com.icesoft.faces.webapp.xmlhttp.PersistentFacesServlet</servlet-class>
<load-on-startup>1</load-on-startup>
</servlet>
<!-- Blocking Servlet -->
<servlet>
<servlet-name>Blocking Servlet</servlet-name>
<servlet-class>com.icesoft.faces.webapp.xmlhttp.BlockingServlet</servlet-class>
<load-on-startup>1</load-on-startup>
</servlet>
<!-- Persistent Faces Servlet Mappings -->
<servlet-mapping>
<servlet-name>Persistent Faces Servlet</servlet-name>
<url-pattern>/xmlhttp/*</url-pattern>
</servlet-mapping>
<servlet-mapping>
<servlet-name>Persistent Faces Servlet</servlet-name>
<url-pattern>*.iface</url-pattern>
</servlet-mapping>
<!-- Blocking Servlet Mapping -->
<servlet-mapping>
<servlet-name>Blocking Servlet</servlet-name>
<url-pattern>/block/*</url-pattern>
</servlet-mapping>
<!-- Welcome File List -->
<welcome-file-list>
<welcome-file>index.xhtml</welcome-file>
</welcome-file-list>
</web-app>
3. Copy the following libs, jar files, from [ICEface installed]\lib to [crm-web-project]\WebContent\WEB-INF\lib
- backport-util-concurrent.jar
- commons-beanutils.jar
- commons-collections.jar
- commons-digester.jar
- commons-discovery.jar
- commons-el.jar
- commons-fileupload.jar
- commons-logging.jar
- el-ri.jar
- icefaces-comps.jar
- icefaces-facelets.jar
- icefaces.jar
- jsf-api-1.2.jar
- jsf-impl-1.2.jar
- jstl.jar
- krysalis-jCharts-1.0.0-alpha-1.jar
5. Select your [Tomcat installed directory]\webapps folder as Destination as shown in figure:
6. Select Overwrite existing file to overwite next time when you export war file again
7. Click Finish to complate war file generation
8. Start Tomcat 6.0, (Restart if already sarted)
9. Then connect your web application using browser and url:http://localhost:8080/crm-web-project/index.iface
10. Congradulation! You've successfully created ICEface application. You'll see the first line of "Tank you for using ICEfaces." in your browser.
In next post, we'll start working on the style and ICEface UI Components.
ctres bien
ReplyDeleteit helps!!! tuto must be as simple as yours! thank you so much! ^^
ReplyDeleteThanks but I will see you later…
ReplyDeleteLet me bookmark it first.
Thanks for providing with coding segment. We provide you with DNS hosting which opens a world of features for your domain. Email Forwarding, Domain Forwarding, IP Forwarding and advanced DNS controls at your fingertips.
ReplyDeleteIt is very interesting for me to read that article. Thank author for it. I like such topics and everything connected to this matter. I definitely want to read more soon.
ReplyDeletehanks ! for sharing this wonderful news with us.I really like your post as it is informative as well as interesting.I am also quite interested to see your upcoming post for Web Development
ReplyDeleteso please keep writing.
This is very much great and hope fully nice blog. Every body can easily found her need able information. I am visit first time but I fond many use full article. I will back again when get time.
ReplyDelete